Are you having trouble with venting a kitchen sink that’s located under a window? Don’t worry, you’re not alone!
Venting a kitchen sink located beneath a window is a difficult job, but it can be done. In this article, we’ll be discussing the steps you need to take to vent your kitchen sink correctly and safely.
We’ll cover everything from planning the vent location to testing for leaks. So, if you’re ready to get started, let’s begin!
Planning the Vent Location
Before beginning, it’s essential to plan where the vent should go – the spot that’ll make it work best.
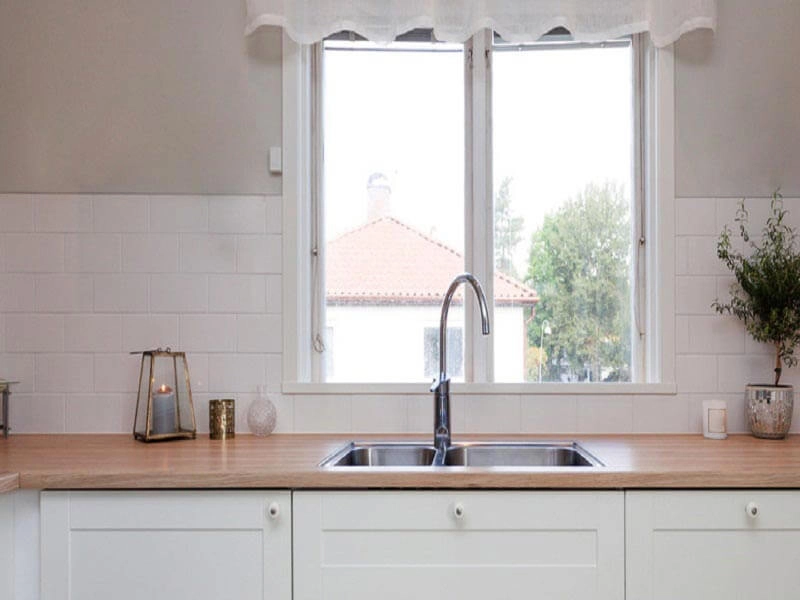
Venting the kitchen sink that is located underneath a window is a bit trickier than if it were in an open area. You’ll need to consider alternative locations for the vent, such as the wall behind the sink or an available floor joist.
If you choose to vent through the wall, you’ll need to purchase the correct venting materials for the job. Make sure the venting material is appropriate for the type of sink you have and that it is flexible enough to fit in the tight space.
If you choose to vent through the floor joist, you may need to find a way to seal off the joist from the rest of the room. This will protect the integrity of the joist and help the vent to function properly.
Gathering the Necessary Tools
Prior to commencing the task, it’s essential to ensure that all the required materials are collected.
To begin, identify the necessary supplies needed to vent a kitchen sink that is under a window. This includes a vent pipe, support brackets, a drill, a measuring tape, and any additional materials to secure the vent pipe in place.
Once the supplies have been identified, it’s important to make sure they are available and in working order. Gather the vent pipe, support brackets, drill, and measuring tape and make sure they’re in proper working condition.
If any of the supplies need to be replaced or are missing, take the time to acquire them prior to beginning the project.
Cutting the Hole for the Vent
With the necessary supplies in hand, it’s time to create an opening for the project to take shape. Before you begin, make sure you’re following all safety rules and regulations while venting. Double-check the vent type you’re using and its required measurements to ensure compatibility with your kitchen sink.
Next, measure and mark the area where you’ll be cutting the hole. Take caution when cutting the hole, as the wall may be thin and fragile. Once the hole is cut, you’ll be able to place the vent pipe inside the wall and secure it with a few screws.
Secure the vent pipe with screws.
Installing the Vent Hood
Now it’s time to give your kitchen a stylish upgrade with the installation of a new vent hood!
When installing the vent hood, you’ll need a few materials such as screws, a drill, and a vent hood of your choice. There are a variety of vent designs available, from sleek stainless steel to classic copper, so you can pick one that suits your style.
Next, line the vent hood up to the hole you cut in the wall and attach it using the screws. Once it’s secured, you can connect the vent hood to the rest of the ventilation system.
Make sure that all the connections are secure and the power is off before you start the installation.
After the installation is complete, you should turn on the power and test the vent hood to make sure it’s working properly.

Sealing the Vent
Once the vent hood is in place, it’s time to seal the edges to keep air from escaping. Start by determining the size of the vent hood and then use a sealant to install it.
Make sure to apply the sealant very carefully, so that there are no gaps left. This will help to keep the air from escaping and will also keep pests from entering the area. Make sure to apply the sealant to the entire edge of the vent hood, so that it is completely sealed.
Once done, you can then let the sealant dry for about 24 hours before using the kitchen sink.
Now that the vent hood is sealed, use a damp cloth to clean off any excess sealant that may have gotten on the window or surrounding area. Make sure to be thorough, as any sealant left on will be hard to remove once it dries.
Make sure to also check the area around the vent hood to make sure that it is properly sealed. Once you have finished cleaning, you can then enjoy the use of the kitchen sink without any air escaping.
Connecting the Vent Pipe
Completing the connection of the vent pipe ensures the safety and security of the space, protecting it from intrusive elements. Depending on the venting options and the pipe routing, you may have to connect the vent pipe to an existing vent stack or to a wall or roof vent.
For the former, you’ll need to use a flexible vent connector to join the vent pipe to the existing vent stack. Secure the vent pipe in place with screws and washers.
For the latter, you have to measure the distance between the vent stack and the wall or roof vent and cut the vent pipe to fit. Use a T-fitting or an elbow joint to join the vent pipe to the wall or roof vent. Secure the connection with screws and washers. Make sure to use a sealant to ensure a tight seal.
Testing for Leaks
After connecting the vent pipe, it’s time to test for any possible leaks to ensure the space is well-protected. Leaks can occur in various locations, so it’s important to identify them and take the necessary steps to waterproof the area.
Here are 4 steps to help you test for leaks:
- Fill the sink with water and check for any water dripping around the vent pipe.
- Check the wall and window frame for any signs of wetness or moisture.
- Look for any water pooling on the floor around the vent pipe.
- Inspect the base of the vent pipe for any signs of water damage or leakage.
If you find any leaks, it’s important to take the necessary steps to waterproof the area. Waterproofing solutions include caulking, sealing, and other material treatments. Make sure to use a waterproof sealant designed for the material that the vent pipe is made of.
Frequently Asked Questions
How do I know where the vent should be located?
When planning the vent placement for your kitchen sink, it’s important to take into consideration the drain pipes.
The vent should be connected to the drain pipe and should be located as close to the roof as possible, allowing air to flow freely.
Make sure the vent is at least 6 inches above the top of the sink, and that it’s not concealed by a window or wall.
What kind of tools do I need to install the vent?
Installing a vent for a kitchen sink that’s under a window requires the right tools. You’ll need to make sure you have the right fitting selection and pipe cutting tools to get the job done correctly.
Look for a pipe cutter that can handle the size of your vent pipe, as well as a wrench for any fittings you may need to attach.
If you have all the necessary tools, you can easily install the vent and have your kitchen sink functioning properly.
How do I ensure the vent hood is installed securely?
Installing your vent hood securely is essential to ensure proper ventilation of your kitchen sink.
When placing the vent, make sure it’s at least 12 inches away from any window or door and is installed according to the manufacturer’s instructions.
Use heavy-duty screws to mount the vent hood and sealant to seal any gaps.
Ensure that all the necessary components, such as a backdraft damper and vent cap, are included in your installation.
With the right tools and techniques, you can ensure a secure installation.
Is there a special type of sealant that should be used?
When installing pipe for your kitchen sink vent, it’s important to use the right type of sealant.
For pipes made from metal, a silicone-based sealant is best. It’s waterproof, flexible, and won’t crack.
For plastic pipes, you should use a polyurethane-based sealant to provide a strong, durable seal.
Be sure to apply the sealant evenly to each section of pipe for the best results.
How do I test the vent pipe for leaks?
Testing the vent pipe for leaks is an important part of venting a kitchen sink.
To do this, you should first clear the drain by running hot water and using a drain clearing agent if necessary.
Once the drain is cleared, you can then perform an air test by plugging the drain and using a pump to fill the vent pipe with air.
If the air pressure remains constant, there are no leaks.
If the pressure drops, however, you’ll need to seal any leaks you find with a special sealant.
Conclusion
You’ve done it! You’re now done venting your kitchen sink that was under a window.
You’ve taken the time to plan the vent location, gather the necessary tools, cut the hole for the vent, install the vent hood, seal the vent, and connect the vent pipe.
Now that you’ve completed all the steps, it’s time to test for any leaks. All you have to do is turn the water on and check for any water coming from the vent.
You can now enjoy your kitchen sink, venting properly and without any leaks. Congratulations!